

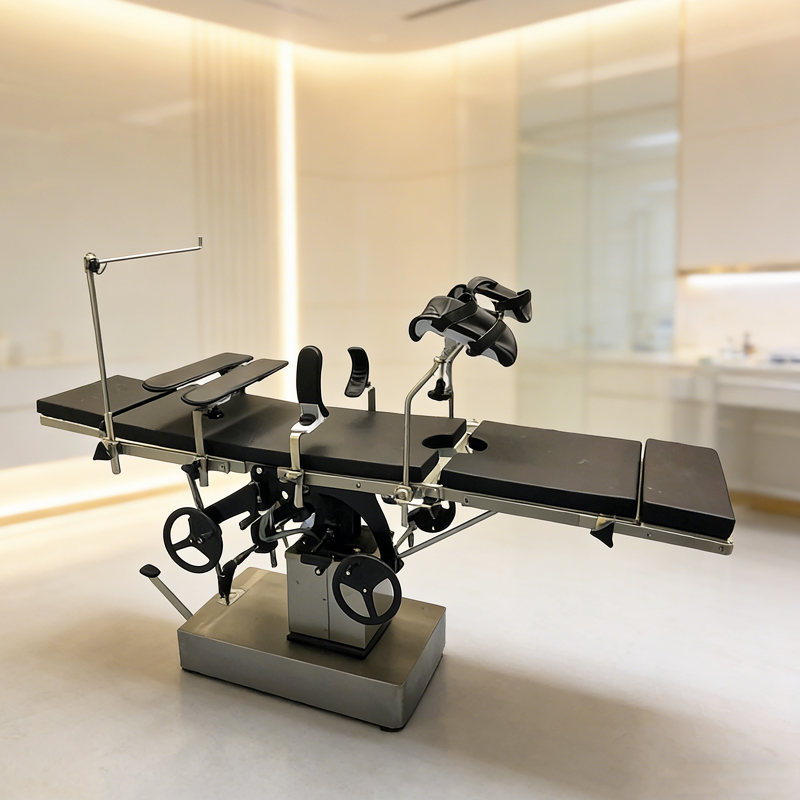

$2,500 for a full cylinder assembly or $150 for a seal kit — that’s the difference between a pool of hydraulic fluid under your operating table and a quick in-house fix. When you notice an operating table hydraulic oil leak repair, the immediate instinct might be to call a service vendor, but the root cause is almost never a cracked cylinder. It’s a degraded polyurethane wiper seal, embrittled by the very disinfectants your cleaning crew uses daily. And the longer you wait, the more likely that $150 repair turns into a $3,000 replacement, not to mention the $3,200 per hour your OR loses while the table is down.
Here’s the specific insight that matters for your uptime KPIs: 80% of hydraulic failures in surgical tables originate from seal degradation caused by quaternary ammonium or iodine-based cleaners. These chemicals attack the nitrile and polyurethane seals, turning them brittle within 18 months to two years. The good news is that with the right quality tolerance in your seal material — specifically, an iodine-resistant polyurethane formula like Sanyang’s OEM seal kit #SY-OT-SP-25 — you can restore the table’s holding power and extend seal life back to the five-to-seven-year design target. Your mean time to repair drops under two hours if you follow a proper bleed procedure with ISO 32 mineral oil, and your parts cost should stay below $200 per incident. That’s a benchmark you can write down and reference on your next supplier call: any claim of a full cylinder replacement should raise a red flag.

Identify the Leak Source: Rod Seal vs. Fitting O-Ring
A single puddle?
Lower the table completely. Clean all oil residue with a degreaser, then raise it 200 mm. Wipe the chrome rod at full extension with a lint-free cloth while an assistant cycles the up/down pedal. A steady film on the rod means the polyurethane U-cup rod seal has embrittled from disinfectant exposure—dynamic seal failure. Dry rod with oil underneath points to a static fitting leak: a crushed crush washer or loose O-ring. For micro-weeps invisible to the eye, dab surgical marker ink on the suspect area; ink bleeding outward under pressure confirms the leak.
To rule out pump bypass: if the table sinks under load and oil appears near the reservoir cap, close the cylinder shut-off valves while the table holds weight. If sinking stops, the cylinder and rod seal are intact—the pump’s internal check valve is bypassing. Replacing the rod seal won’t fix this. Document your diagnosis: 80% of operating table hydraulic failures originate from seal degradation due to harsh disinfectants (ERD technician case data), not from the pump or fittings.

Step-by-Step Seal Replacement Procedure
A twisted seal bypasses immediately.
Disconnect power. Support the table top with a safety stand. Fully depressurize the system by cycling the pedal several times. Remove the retaining cap using face spanner #SY-OT-SP-25. Extract the gland nut.
- Face spanner #SY-OT-SP-25: Factory‑specified tool prevents cap stripping. Adjustable pin wrenches damage the nut and cause future leaks.
- Torque wrench (10–100 N·m range): Critical for retorquing cap to 65 N·m. Guessing torque leads to seal bypass or thread damage.
- Brass O‑ring pick set: Brass is soft enough to clean the seal groove without scratching the gland surface.
- Lint‑free wipes: Cotton or paper debris contaminates the hydraulic circuit. Use only low‑lint medical wipes.
- ISO 32 mineral oil: Only approved fluid. Using ATF reduces pump life by 40% per Sanyang factory tests.
- OEM seal kit #SY-OT-SP-25: Includes polyurethane U‑cup, wiper, and O‑rings pre‑warmed for easier installation. Generic nitrile seals fail in 18 months under quat cleaner exposure.
Before sliding the new seal onto the rod, use a thin plastic sleeve—a cut‑open syringe barrel works—to guide the lip. Forcing the seal without a sleeve twists the lip, causing immediate bypass. Many ‘repaired’ tables have been observed leaking again simply because this step was skipped.
Now follow the 10‑step sequence. First, clean the seal groove with the brass pick to avoid scoring the gland. If the new polyurethane U‑cup is not pre‑warmed, heat it to exactly 40°C in a clean oven or heat gun. (Sanyang’s OEM kit arrives pre‑warmed for installation.) Once the U‑cup is seated, install the wiper and O‑rings in the correct order. Reinstall the gland nut and retorque the cap to 65 N·m—no more, no less. Always replace the dust wiper simultaneously; a scarred rod from a neglected wiper will destroy a new seal within weeks.
After reassembly, cycle the table slowly through full lift and lower five times without load. Then place a 135 kg patient‑equivalent load and cycle again. Air pockets often remain hidden until the system is under stress, causing a tell‑tale sinking feel. Only after this full‑load bleed test should the table return to service. Skipping the load test is the second most common mistake—it leads to unsafe table bounce during surgery.

Fluid Refill and Air Bleed the Right Way
Skip the weight-on bleed step and you’ll send the table back to surgery with hidden air pockets that cause dangerous bounce.
Use the vacuum-fill method. Attach a hand pump with a clear hose to the reservoir fill port. Draw a slight vacuum, then feed ISO 32 mineral oil until air bubbles cease. Fill to exactly 15 mm below the reservoir neck — overfilling causes hydraulic lock and pump damage. Cycle the table slowly through full lift/lower five times to expel trapped air, then recheck the level and top up as needed.
- Oil Specification: Use only ISO 32 mineral oil. Brake fluid attacks nitrile seals. ATF contains detergents that foam in high-pressure circuits, leading to cavitation. Sanyang factory tests confirm using ATF reduces pump life by 40%.
- Refill Mark: Reservoir fill mark is 15 mm below the neck, not full. Measure from the neck rim down. Overfilling past this mark locks the pump and can burst the reservoir seal.
Bleed with weight on. After the empty-table bleed cycle, place a 135 kg load — standard patient weight — directly on the table top. Cycle the lift/lower again. Air pockets often remain hidden until the system is under stress, showing up as a tell-tale sinking feel. Only after a full-load bleed test should the table return to service. Skipping this step means a table that seems fine empty but drops under patient load, costing roughly $3,200 per hour of OR downtime when it fails mid-procedure.


Seal-Reactive Disinfectants: The Silent Killer
Your disinfectant is silently destroying your seals.
The polyurethane wiper seal on your hydraulic rod is being chemically dissolved by the very cleaners meant to keep the OR sterile. Quaternary ammonium compounds and iodine-based disinfectants cause embrittlement — visible under SEM as micro-cracks at 18 months — which progress to full tears. The result is a hydraulic leak that appears to come from the cylinder but actually originates from a seal that lost its flexibility. Tables with perfectly good cylinder bores have been observed being scrapped because the rod was scored by contamination trapped inside a brittle wiper.
- Cost of Quat Damage: A single $5 bottle of quat cleaner can cost your hospital over $10,000 in seal replacements and lost OR time over two years. Each seal replacement kit is $150, but the real cost is downtime: $3,200 per hour. A table leaking because of chemical attack will need three seal replacements in two years instead of one at the 7-year mark.
- Lifespan Comparison: Seals exposed to alcohol-based wipes last 5–7 years. With daily quat or iodine exposure, that drops to 2–3 years. The standard nitrile seals supplied by generic parts distributors fail even faster — embrittlement within 12–18 months.
- Root Cause Data: ERD technician case data confirms that 80% of hydraulic failures originate from seal degradation due to harsh disinfectants, not from cylinder wear or pump failure.
Switch immediately to hydrogen peroxide or alcohol-based wipes for rod cleaning during terminal cleaning. They are effective disinfectants that do not attack polyurethane or nitrile. Additionally, cap the rod boot with a silicone sleeve during cleaning to prevent chemical splash from pooling around the seal. The Sanyang rebuild kit (part #SY-OT-SP-25) uses an iodine-resistant polyurethane formula that outlasts generic nitrile seals — but even that will fail prematurely if you keep using quat-based cleaners.
Conclusion
A hydraulic leak on an operating table isn’t a cylinder failure. It’s a seal that turned brittle from cleaning chemicals. Diagnose it right, swap the wiper and U-cup, refill with ISO 32, and you’re back under your $200 parts target. Skip that and you’re looking at a $2,500 cylinder assembly and three hours of lost OR time. The industry benchmark for an in-house seal replacement? Under one hour and $150 in parts. You can hit that number consistently when you use an OEM kit with pre-warmed, iodine-resistant polyurethane.
Now check your cleaning protocol. If your team uses quat-based disinfectants on the hydraulic rod, you’re cutting seal life from seven years down to two. Swap to hydrogen peroxide wipes or fit a silicone sleeve over the rod boot during terminal cleaning. And when you need a rebuild kit, pull the serial number from your table and request the Sanyang SY-OT-SP-25 set. It comes with the correct torque spec card and a matched set of seals that won’t fight you during installation.
Frequently Asked Questions
Why does my operating table sink slowly when loaded?
Slow sinking under load usually means the pump’s internal check valve is bypassing oil, not an external seal leak. Isolate the cylinder with a shut-off valve to confirm, because a worn dynamic seal. Test the check valve before ordering a seal kit.
Can I use silicone oil to reduce seal wear?
No—silicone oil is not compatible with polyurethane seals and can cause swelling or embrittlement. Use only the manufacturer-specified hydraulic fluid, typically ISO 32 or 46 mineral oil, to avoid accelerated seal failure. Check your table’s manual for the approved fluid grade.
How long do operating table hydraulic seals last?
With proper maintenance and neutral cleaners, polyurethane seals last 5–7 years. Regular use of quaternary ammonium disinfectants can cut that lifespan to 2–3 years by embrittling the material. Switch to approved disinfectants to maximize seal life.
Can I use a sealant or epoxy to patch a leaking rod wiper?
No—a leaking rod wiper indicates a failed U‑cup seal that cannot be patched; sealant will only trap debris and score the chrome rod. Replace the wiper and polyurethane seal as a. Order a replacement wiper kit rather than attempting a temporary patch.
How can I order a seal kit for my specific table model?
Contact Sanyang Medical with your table model number and serial—our OEM seal kit (part SY-OT-SP-25) is pre-warmed for easy installation and uses an iodine-resistant polyurethane formula. Generic nitrile kits from. Send a photo of the cylinder nameplate to speed up the order.
You May Also Like...

Surgical Light Control Systems Explained: Touch Panels, Wall Controls, Sterile Handles and Integrated OR Control
A practical guide to the five surgical light control systems - touch panels, wall control...
Surgical Light Tender Specifications: The Complete Procurement Checklist
A practical checklist of the photometric parameters, certifications, and evaluation steps that belong in every...

Surgical Light Installation Requirements: Ceiling Load, Height and Coordination Guide
A practical guide to surgical light installation requirements: ceiling load and moment, clear height, arm...
